What is the benefit of using a curved screen?
The main benefit of using curved screens for visual displays, is that for known viewer position, a screen with the same physical screen size produces a wider field of view for a curved screen than a flat screen.This is because as the edges of the screen move closer towards to viewer, the field of view increases.
This effect provides a greater sense of immersion in the display environment and can improve visual perception due to the increased area of peripheral vision achieved. In addition, a number of projectors can be used in a display to increase a field of view (FoV) to reach anywhere up to 360 degrees coverage. To produce a display with multiple projectors, firstly overlapping regions will need to be set-up and then edge blending can be used to produce a seamless image with multiple projectors. Click here for further information.
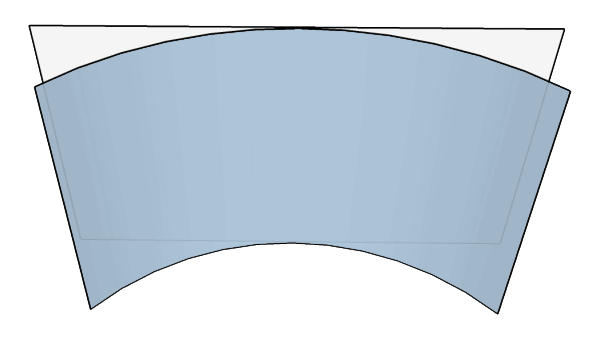 Figure 1: Planar and curved screen with the same physical dimensions
Figure 2 shows a presentation of the difference between a planar and curved screen with the same physical size. The light gray volume indicates the planar screen and the blue volume clearly indicates the additional view achieved with a curved screen.
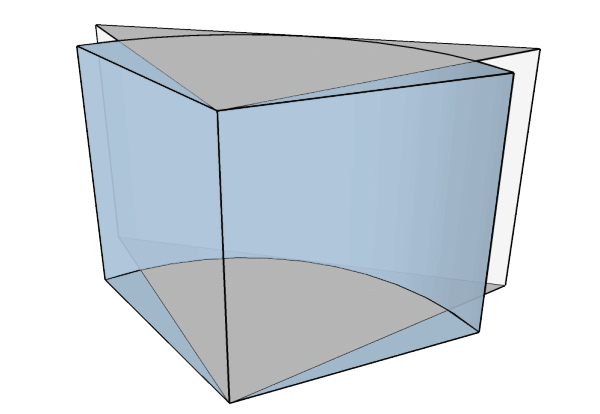 Figure 2: View angles of a planar and curved screen
Although the above indicates the benefits of curved screen displays, it is also worth noting that this benefit can be increased with the addition of extra projectors.
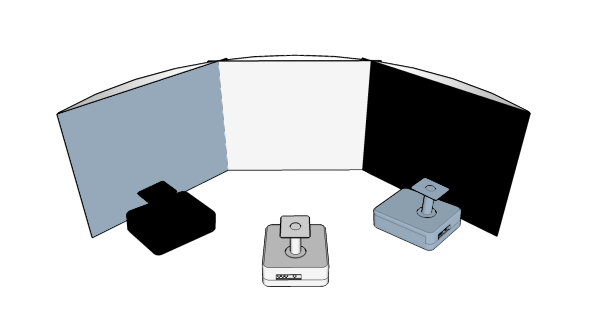 Figure 3: View angles of a planar and curved screen
Figure 3 indicates a larger curved screen using 3 projectors to fill the screen area. The planar screens indicate the image generated from each corresponding projector. It can be seen from the figure that the projector images overlap and don’t fill the screen correctly. To achieve a seamless image across the entire display, a number of techniques are needed.
Firstly, the projectors need to be aligned so they overlap. This overlapping region is used so each image can be joined together using a technique known as edge blending so no visual joins appear in the end display. Finally, the images also need to be aligned correctly on the screen using geometric correction.
Download Resource